 The Kiosk PC |
I've always thought it is a pity that digital pictures just stagnate on my hard drive. Sure we send some of them to
Kellards to have prints made, but by and large if I don't put them on a web site they just get forgotten...
You can buy a digital picture frame. But they cost hundreds of bucks for a decent one, and the size and resolution is kind of small, and you can't do anything else with them. I've seen wall mounted PCs that replicate what I've built that are priced at over $3000.
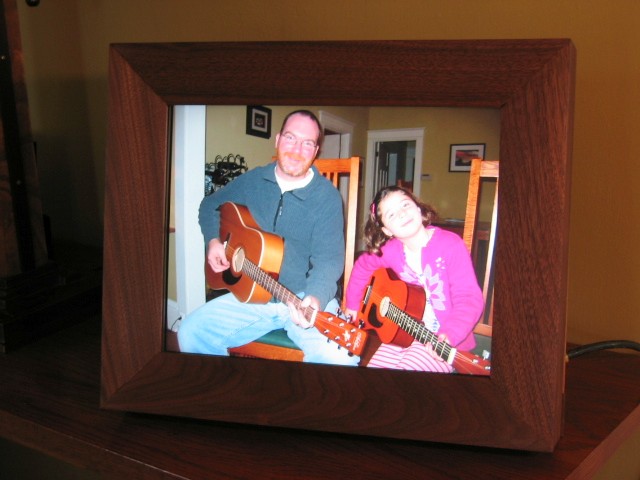
Why not build a really small and weak PC, slap a nice wood frame around it, and do oh so much more? I got some plans from a copy of Popular Electronics or some such journal (article no longer available) for doing just such a project. To summarize the hardware design, it is a mini-ITX motherboard with an integrated fanless CPU, a low power fanless power supply, and a 15 inch LCD monitor. With no fans, it is as close to silent as possible; you have to strain to hear the hard drive running. I attached a CD ROM drive just to install the operating system and then removed it. You don't need a Pentium 4 if all you need to do is display pictures and a few web pages. The Mini-ITX motherboards are used for a lot of custom small form factor PCs. They are the favored platform for building custom car PCs for example. This was a fun project as I was able to combine my dual passions for woodworking and technology. It also made good use of some nice bits and pieces of walnut that Rick Stover, a former co-worker, gave me when he was cleaning out his garage.
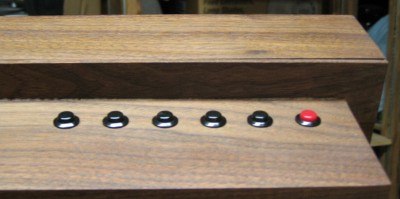
The case is in two pieces, one piece is the front that is built to look like a picture frame. Mitered corners, reinforced with biscuits. There is a separate back piece that covers the PC guts. The finish is polymerized tung oil and paste wax. Threaded inserts in the front piece let me attach the pieces together with machine screws. I mounted some buttons on top for power and running a set of macros to launch programs: that's the "kiosk" bit of the design.
 Vented Backside |
A view of the back. I had some nice 1/4" cherry plywood laying about so used it for the back panel. I routed slots in it for ventilation, and cut a hole out for 2 USB ports so I can hook a keyboard and mouse up should I need to do some maintenance. Normally it won't have a keyboard or mouse. And really I can use remote desktop for most maintenance tasks.
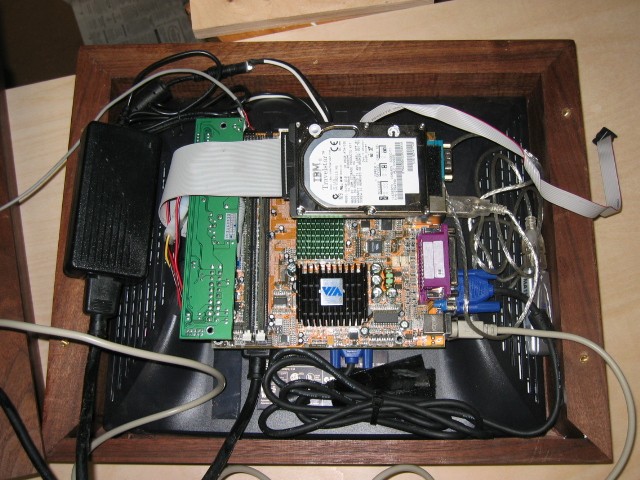 The Guts |
Here are the guts. I used a 6 GB hard drive from an IBM laptop, bought on EBay and an 802.11b USB wireless network card. It has onboard ethernet but with the wireless adapter I can put the thing anywhere there is a power outlet. I made extensive use of velcro and zip ties to hold everything together.
 Fancy Push Buttons |
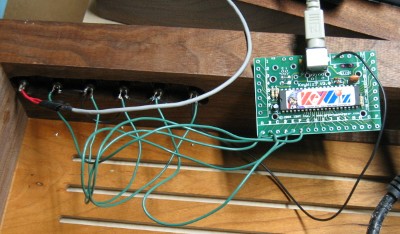 The Magical KeyWiz |
I didn't want it to be limited to strictly timed slideshows of digital pictures. That seems like a waste of a PC. I thought it would be nice if there could be a very simple way to bring up other applications to display information you might want to refer to without having to trek down to the basement to one of the regular PCs. Traffic for example -- if we are running out the door it would be nice to pull up the WSDOT real time traffic conditions map. I didn't want to ruin the clean looks by parking a keyboard in front of it though. After consulting with Dex I thought I could use a similar approach to what the MAME console builders use. I found this handy piece of hardware called a
KeyWiz to solve my problem. It connects to the keyboard port on the motherboard and has spots for you to solder wires going to your own buttons. Press a button and the PC sees it just as if someone typed the "A" key or whatever. The KeyWiz can take up to 32 buttons, far more than I need. I could only really think of the traffic web site initially, but I mounted some additional buttons, reserved for future use. I use
Girder software to handle the macro automation, binding keyboard press of the A key to run a program. It is pretty sophisticated, I use it for the Home Theater to handle HTPC automation by infrared remote control. I bought the buttons from
Mouser and put a red on on there for a power button.
I've got one button that brings up the traffic web page, one that brings up a web page where I can control the Squeezebox digital music player we have in the living room, and one that brings up the MSNBC.com main news page. I thought it might be nice to have a family calendar on there too, but I don't think I can get Kim off of paper and haven't found a great simple way to securely synch with my work calendar.
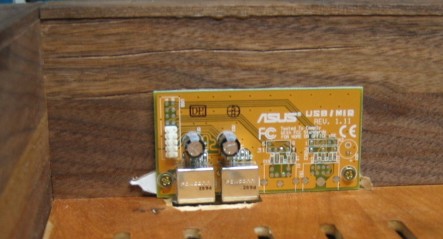 USB Ports |
Here are the USB connectors from the inside.
Here's my best recollection of what the materials cost:
- Via Epia 5000 Mini-ITX motherboard with bundled 60W mini-ITX power supply and AC/DC power adapter, about $150
- Salvaged memory from a junk PC, $0
- 6 GB IBM hard drive from EBay, $25
- KeyWiz, $35
- Salvaged USB ports from junk parts box, $0
- Push buttons from Mouser, $20
- Dell monitor bought on EBay, $200
- USB adapter for motherboard pinout and power cable splitter, $20
- Windows XP Pro from Microsoft Company Store, $25
- Netgear USB wireless network adapter from Newegg, $25
So the total is about $500. Not bad for a PC with monitor. And it is really fun to see it randomly scroll through hundreds of digital pictures from vacations, family gatherings, milk carton boat derbies, and other assorted antics.
I've received many compliments on this project, particularly on how well it complements the furnishings of the living room. Kim and I do some volunteer work with an exec admin to a Microsoft VP who stormed into his office after seeing this demanding "Why can't I buy one of those things!!"